
Mexican Street Corn
- Jul 22, 2022
- 2 min read

Looking for a side dish to spice up your next barbecue? Try my Mexican street corn, known as elote in Mexico.
Elote—the classic Mexican street food—is corn on the cob grilled over hot coals and coated with a creamy, spicy cheese sauce. Grilling shucked ears of corn over hot coals brings out the corn’s nutty flavor; and covering it with a cheese sauce, well, it’s just to die for.
The original sauce for Mexican street corn is made with butter, mayonnaise, cotija cheese, and chile powder. I like substituting Mexican crema for the butter, which is similar to sour cream. Adding some cilantro, minced jalapeño, lime zest, and lime juice to the cheese sauce makes this dish spicy, sweet, savory, creamy, and tart—a real burst of flavors.
This dish is really messy. Don’t cut the bottom stalk off the cob. Keep it on and use it as a handle. If your supermarket is out of cotija cheese, substitute queso.
Mexican Street Corn 4 ears corn Cooking spray for coating corn ½ cup cotija or queso cheese, finely crumbled, plus more for serving ¼ cup mayonnaise ¼ cup Mexican crema ¼ of a jalapeño, seeded and minced ¼ cup chopped cilantro, plus more for serving 1 teaspoon minced garlic ½ teaspoon chipotle chile powder, plus more for serving ½ teaspoon salt 2 teaspoons lime zest 2 teaspoons lime juice Preheat the grill to a high heat.
Remove husks from corn and rinse cobs under cold water, removing silks. Lightly spray each cob with cooking spray.
In a medium bowl, place cheese, mayonnaise, Mexican crema, jalapeño, cilantro, garlic, chipotle chile powder, salt, and lime juice and zest and stir to combine. Place corn on the grill and grill for about 12 minutes, turning cobs ¼ turn every 3 minutes.
Using a pastry brush, top each corn cob with the cheese mixture. Sprinkle with additional cheese, cilantro, and chipotle chile powder to taste.
Tips on shopping for corn: Examine the husks first. Husks should be bright green and fit snugly. My father taught me to pull back enough of the husk to expose the kernels. To judge the quality of corn by its kernels, look for evenly spaced rows that are plump and milky all the way to the ear. The silks should be dry and deep gold in color. Avoid corn with soggy silks. Occasionally, you will find your supermarket sells corn packed in trays. Examine these ears carefully as they may be old. Corn with flattened, tightly packed kernels will be starchy.
Tips on storing corn: Place the ears in plastic bags before refrigerating. They will keep 1 to 2 days.
Tips on prolonging the life of cilantro: To help prolong the life of some herbs, like cilantro, place them in a glass of water, stems down, cover with a plastic bag, secure the bag with a rubber band, and refrigerate. Change the water every 2 days. Tips on juicing limes: If you don’t have a lime juicer, cut the lime in half, hold the lime over a small bowl, and rotate a fork in the pulp, releasing juice.
Carol Ann
Carol Ann Kates is the award-winning author of cookbook, Secret Recipes from the Corner Market and Insider Grocery Shopping Secrets. She’s an expert in how to shop, select, and store produce for maximizing home cooking outcomes and minimizing time and money spent. As a former supermarket and deli operator, Carol Ann shares grocery-insider wisdom—the same expertise you used to receive when patronizing a mom-and-pop establishment. Contact her at CarolAnn@CarolAnnKates.com and explore her website, www.CarolAnnKates.com.
Copyright 2022 All Rights Reserved Carol Ann Kates
1
Searing the Beef
Sear beef fillets on high heat for 2 minutes per side to form a golden crust. Let it cool before proceeding to keep the beef tender.
1
Searing the Beef
Sear beef fillets on high heat for 2 minutes per side to form a golden crust. Let it cool before proceeding to keep the beef tender.
1
Searing the Beef
Sear beef fillets on high heat for 2 minutes per side to form a golden crust. Let it cool before proceeding to keep the beef tender.
1
Searing the Beef
Sear beef fillets on high heat for 2 minutes per side to form a golden crust. Let it cool before proceeding to keep the beef tender.
Notes


1
Season the good fresh beef fillets with salt and black pepper. Heat olive oil in a pan over high heat and sear the fillets for 2 minutes per side until it fully browned. Remove the beef from the pan and brush with a thin layer of mustard. Let it cool.
1
Season the good fresh beef fillets with salt and black pepper. Heat olive oil in a pan over high heat and sear the fillets for 2 minutes per side until it fully browned. Remove the beef from the pan and brush with a thin layer of mustard. Let it cool.
1
Season the good fresh beef fillets with salt and black pepper. Heat olive oil in a pan over high heat and sear the fillets for 2 minutes per side until it fully browned. Remove the beef from the pan and brush with a thin layer of mustard. Let it cool.
1
Season the good fresh beef fillets with salt and black pepper. Heat olive oil in a pan over high heat and sear the fillets for 2 minutes per side until it fully browned. Remove the beef from the pan and brush with a thin layer of mustard. Let it cool.
Instructions
Quality Fresh 2 beef fillets ( approximately 14 ounces each )
Quality Fresh 2 beef fillets ( approximately 14 ounces each )
Quality Fresh 2 beef fillets ( approximately 14 ounces each )
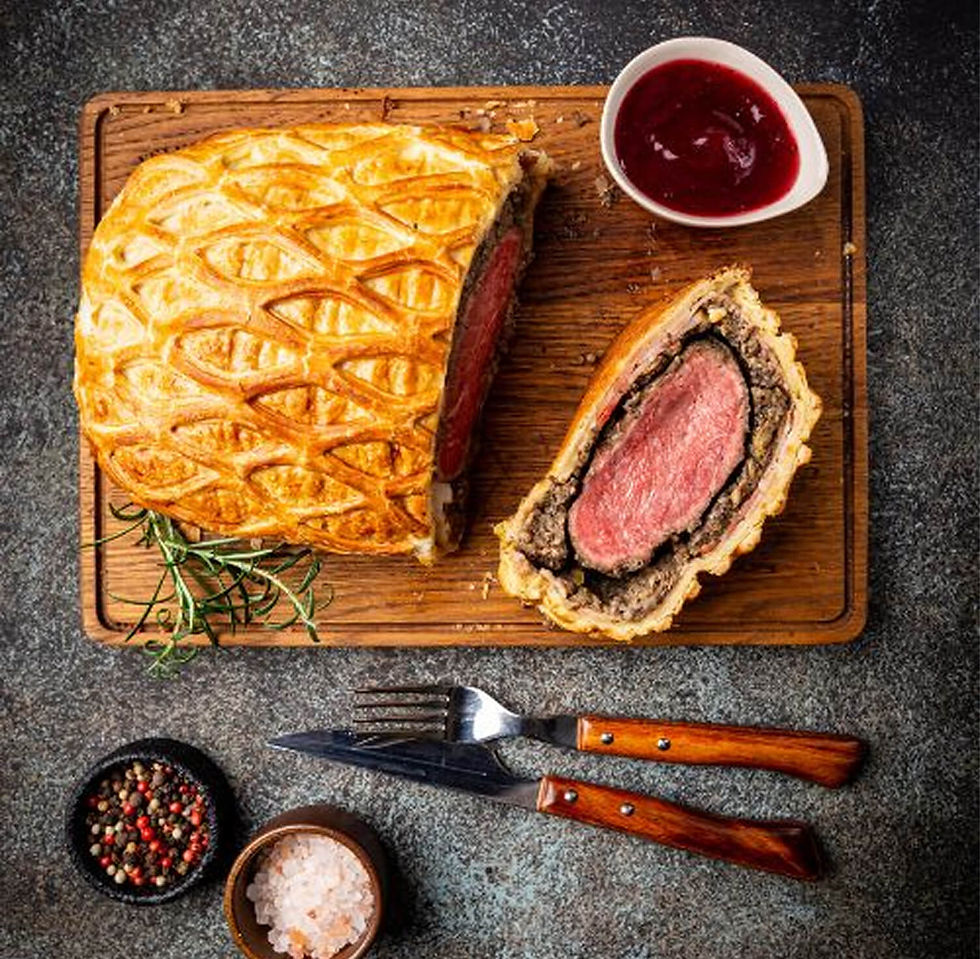
Beef Wellington
Beef Wellington
Fusion Wizard - Rooftop Eatery in Tokyo
Author Name
%20(1).jpg)
Beef Wellington is a luxurious dish featuring tender beef fillet coated with a flavorful mushroom duxelles and wrapped in a golden, flaky puff pastry. Perfect for special occasions, this recipe combines rich flavors and impressive presentation, making it the ultimate centerpiece for any celebration.
Servings :
4 Servings
Calories:
813 calories / Serve
Prep Time
30 mins
Prep Time
30 mins
Prep Time
30 mins
Prep Time
30 mins
Commentaires