
<strong>Homemade Sloppy JoesA Nostalgic and Easy Weeknight Meal</strong>
- Sep 16, 2022
- 3 min read

The origin of the Sloppy Joe is as messy as the sandwich. Some food historians believe it was invented in 1930 by a cook named Joe who worked at a restaurant in Sioux City, Iowa. Legend has it Joe added tomato sauce to a loose meat sandwich, which was popular in Iowa at the time, and, viola, the Sloppy Joe became a customer favorite.
Others claim this sandwich originated at Sloppy Joe’s Bar in Havana, Cuba. The bar owner, José García, served a handheld version of ropa vieja to his customers. García’s bar was quite messy, so his customers nicknamed the sandwich a Sloppy Joe because it was as messy as the bar. Nothing quite like eating a messy sandwich in a messy bar. The sandwich found popularity in the United States thanks to Ernest Hemingway who frequented García’s bar and shared the recipe with his favorite restaurant in Key West, which was later named Sloppy Joe’s.
Another version credits the Town Hall Deli in South Orange, New Jersey, with creating the Sloppy Joe in 1935. The Town Hall version, however, includes roast beef, turkey, Russian dressing, and Swiss cheese and is served on thin Pullman rye bread. Not the Sloppy Joe I ate as a kid.
The first time I ate this delicacy was in the school cafeteria of my elementary school. I really didn’t care who invented it.
Homemade Sloppy Joes Serves 6
A great autumn supper. Serve with carrot sticks or your favorite raw veggies, fresh fruit, and cheese slices or splurge and make French fries. This recipe is a hit with kids and football fans alike. When time allows, I like to make everything from scratch. This recipe can be prepared in about 30 minutes and is superior to the canned version.
2 pounds lean ground beef 2 medium onions, chopped 1 green bell pepper, cored, seeded, and chopped 2 teaspoons minced garlic 3 teaspoons chili powder 2 cans (28-ounces) Italian plum tomatoes, chopped 2 cans (6-ounces) tomato paste ½ cup bottled chili sauce ½ cup canned beef broth 1 ½ teaspoons Worcestershire® sauce Salt to taste Large grind black pepper to taste Kaiser rolls or your favorite sandwich buns In a large heavy skillet, brown ground beef over medium heat. Cook until meat just begins to lose its pink color, crumbling it with a fork, about 5 minutes. Add onion, green bell pepper, and garlic. Cook until vegetables begin to soften, stirring occasionally, about 5 minutes. Mix in chili powder and stir 1 minute. Add tomatoes and juices, tomato paste, chili sauce, beef broth, and Worcestershire® sauce. Cook until mixture is thick, stirring occasionally, about 15 minutes. Season to taste with salt and pepper. Serve on Kaiser rolls.
Tip for storing ground beef: When exposed to oxygen, ground beef will become a rosy, red color. Sometimes you may find the center of a package of ground beef has darkened. This is not harmful. This is the result of lack of exposure to oxygen. If you have concerns about ground beef, check the smell. It should be fresh, not sour, and the meat should feel moist not slimy.
Cooking tip: If you are making a sandwich that has a saucy filling, like sloppy Joes, toast the bread before assembling the sandwich.
Carol Ann
Carol Ann Kates is the award-winning author of cookbook, Secret Recipes from the Corner Market and Insider Grocery Shopping Secrets. She’s an expert in how to shop, select, and store produce for maximizing home cooking outcomes and minimizing time and money spent. As a former supermarket and deli operator, Carol Ann shares grocery-insider wisdom—the same expertise you used to receive when patronizing a mom-and-pop establishment. Contact her at CarolAnn@CarolAnnKates.com and explore her website, www.CarolAnnKates.com.
Copyright 2022 All Rights Reserved Carol Ann Kates
1
Searing the Beef
Sear beef fillets on high heat for 2 minutes per side to form a golden crust. Let it cool before proceeding to keep the beef tender.
1
Searing the Beef
Sear beef fillets on high heat for 2 minutes per side to form a golden crust. Let it cool before proceeding to keep the beef tender.
1
Searing the Beef
Sear beef fillets on high heat for 2 minutes per side to form a golden crust. Let it cool before proceeding to keep the beef tender.
1
Searing the Beef
Sear beef fillets on high heat for 2 minutes per side to form a golden crust. Let it cool before proceeding to keep the beef tender.
Notes


1
Season the good fresh beef fillets with salt and black pepper. Heat olive oil in a pan over high heat and sear the fillets for 2 minutes per side until it fully browned. Remove the beef from the pan and brush with a thin layer of mustard. Let it cool.
1
Season the good fresh beef fillets with salt and black pepper. Heat olive oil in a pan over high heat and sear the fillets for 2 minutes per side until it fully browned. Remove the beef from the pan and brush with a thin layer of mustard. Let it cool.
1
Season the good fresh beef fillets with salt and black pepper. Heat olive oil in a pan over high heat and sear the fillets for 2 minutes per side until it fully browned. Remove the beef from the pan and brush with a thin layer of mustard. Let it cool.
1
Season the good fresh beef fillets with salt and black pepper. Heat olive oil in a pan over high heat and sear the fillets for 2 minutes per side until it fully browned. Remove the beef from the pan and brush with a thin layer of mustard. Let it cool.
Instructions
Quality Fresh 2 beef fillets ( approximately 14 ounces each )
Quality Fresh 2 beef fillets ( approximately 14 ounces each )
Quality Fresh 2 beef fillets ( approximately 14 ounces each )
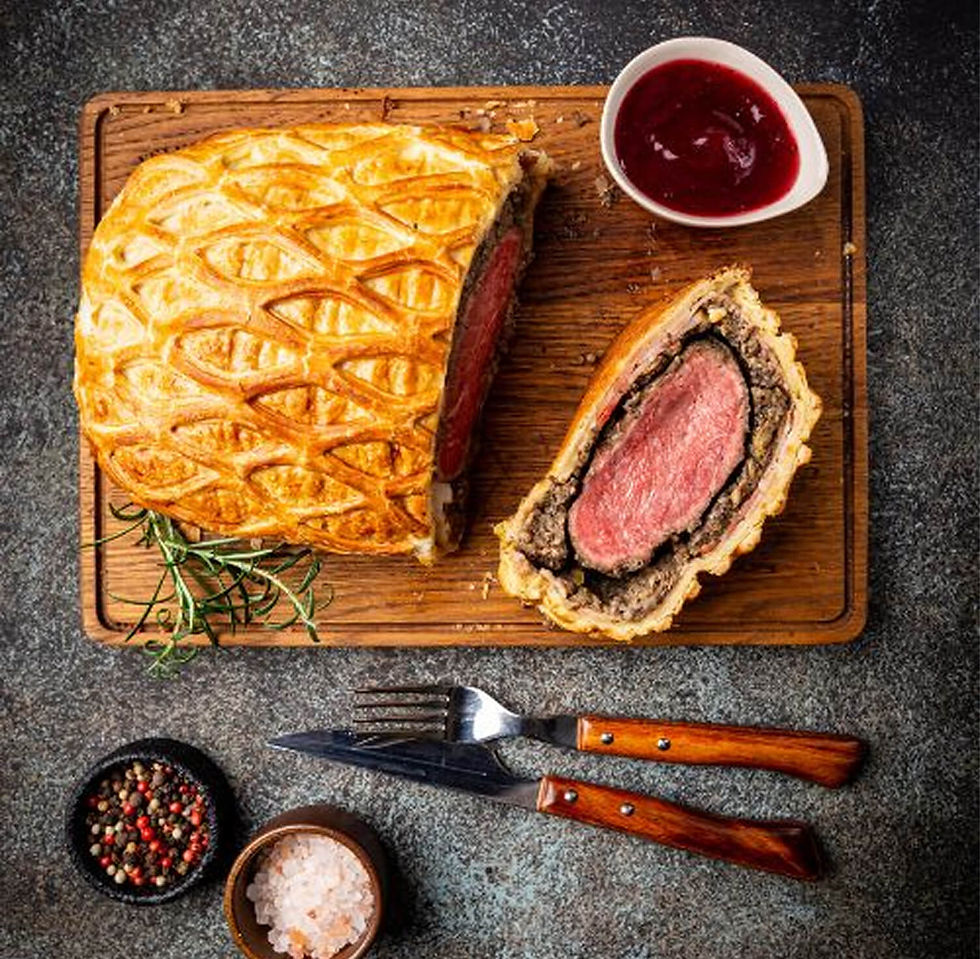
Beef Wellington
Beef Wellington
Fusion Wizard - Rooftop Eatery in Tokyo
Author Name
%20(1).jpg)
Beef Wellington is a luxurious dish featuring tender beef fillet coated with a flavorful mushroom duxelles and wrapped in a golden, flaky puff pastry. Perfect for special occasions, this recipe combines rich flavors and impressive presentation, making it the ultimate centerpiece for any celebration.
Servings :
4 Servings
Calories:
813 calories / Serve
Prep Time
30 mins
Prep Time
30 mins
Prep Time
30 mins
Prep Time
30 mins
Comments